
Exchange Online is a pay-as-you-go service where you only have to pay for accounts that you need to logon to with unique credentials. This means that you can add additional capability at no extra cost, by using mechanisms such as Shared Mailboxes and Distribution Groups. The various mechanisms have differing characteristics, and it can be quite an art picking out what suits best for a given scenario, while also considering the overall supportability of the environment.
Let’s start by introducing the main cast:
- Mailboxes: These are the only elements that are assigned a licence (=cost), and provide you with a secure identity controlling access to the mailbox.
- Shared Mailboxes and Resource Mailboxes: These are used for bookings and for additional mailboxes that users can share by granting access rights. You can assign any number of these to a user, but take care as each mailbox get synchronised creating performance and networking overheads. Resource Mailboxes are typically used for meeting rooms and things like pool cars that people can book.
- Distribution Groups: The obvious use for Distribution Groups is for team emails; they can be limited to internal only, or available externally as well. Distribution Groups can also be used as a more efficient alternative to some ‘Shared Mailbox’ scenarios where a user needs to operate using another email address (such as sales@acme.com).
- Aliases: The humble alias lets you be known by other names, like ‘joe’, as well as ‘joe.bloggs’, but when you send an email, you are still known only by your primary email address.
Using Distribution Groups to operate on multiple email addresses.
In this exercise we will go through the process that can be used to allow a single user to operate using multiple email addresses, including making it appear like a separate mailbox.
In this example we will allow user ‘Andrew’ to operate a sales@cumulonimbusblue.net mailbox, without using a separate account, or a cumbersome Shared Mailbox.
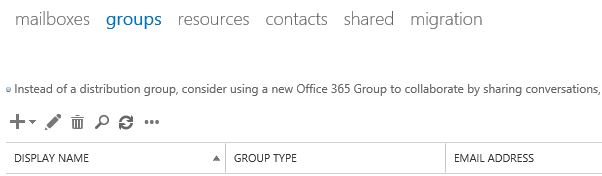
We start in the Office 365 portal under Exchange Management. Click ‘+’ to create a new Distribution Group.
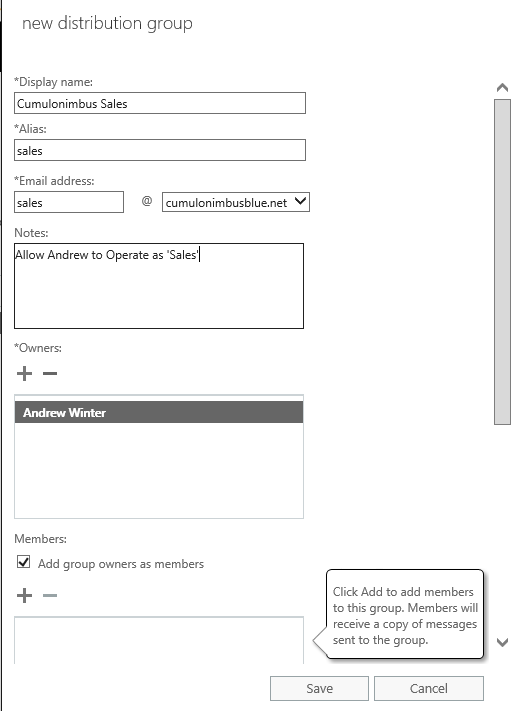 Add the Distribution Group. If the Owner is not a Member of the group, add the Group Member.
After you have saved the Distribution Group, come back and Edit it to make the following refinements:
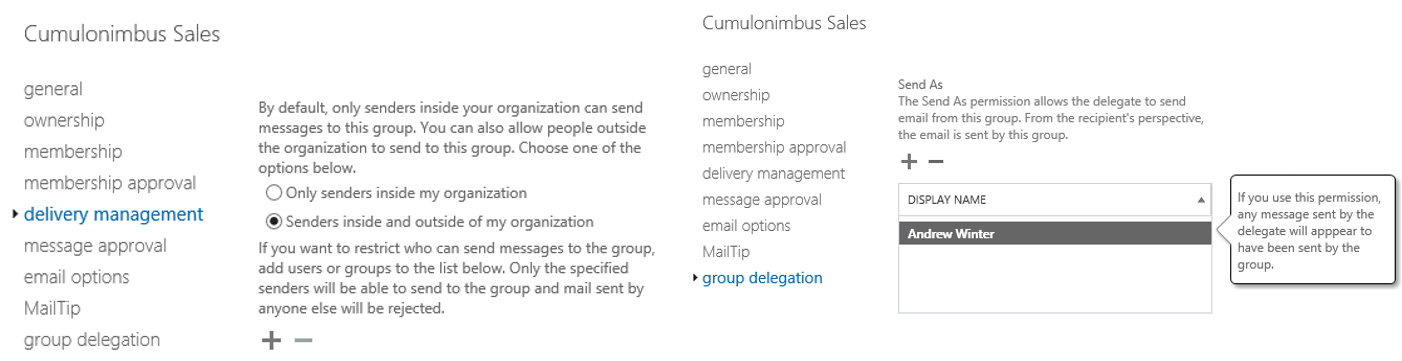
- Under Delivery Management, allow access from outside the organisation:
- Under Group delegation, allow the user to ‘Send As’ the Distribution Group. This allows Andrew to send as ‘Sales@’.
See below screenshots for these Delivery Group settings.
Now you are done setting up the Distribution list, and ready to make some fine tuning in Outlook to make it easier.
 In Outlook, create a new folder called ‘Sales’.
Now we can create a rule that sends any new email for ‘sales@’ to this folder.
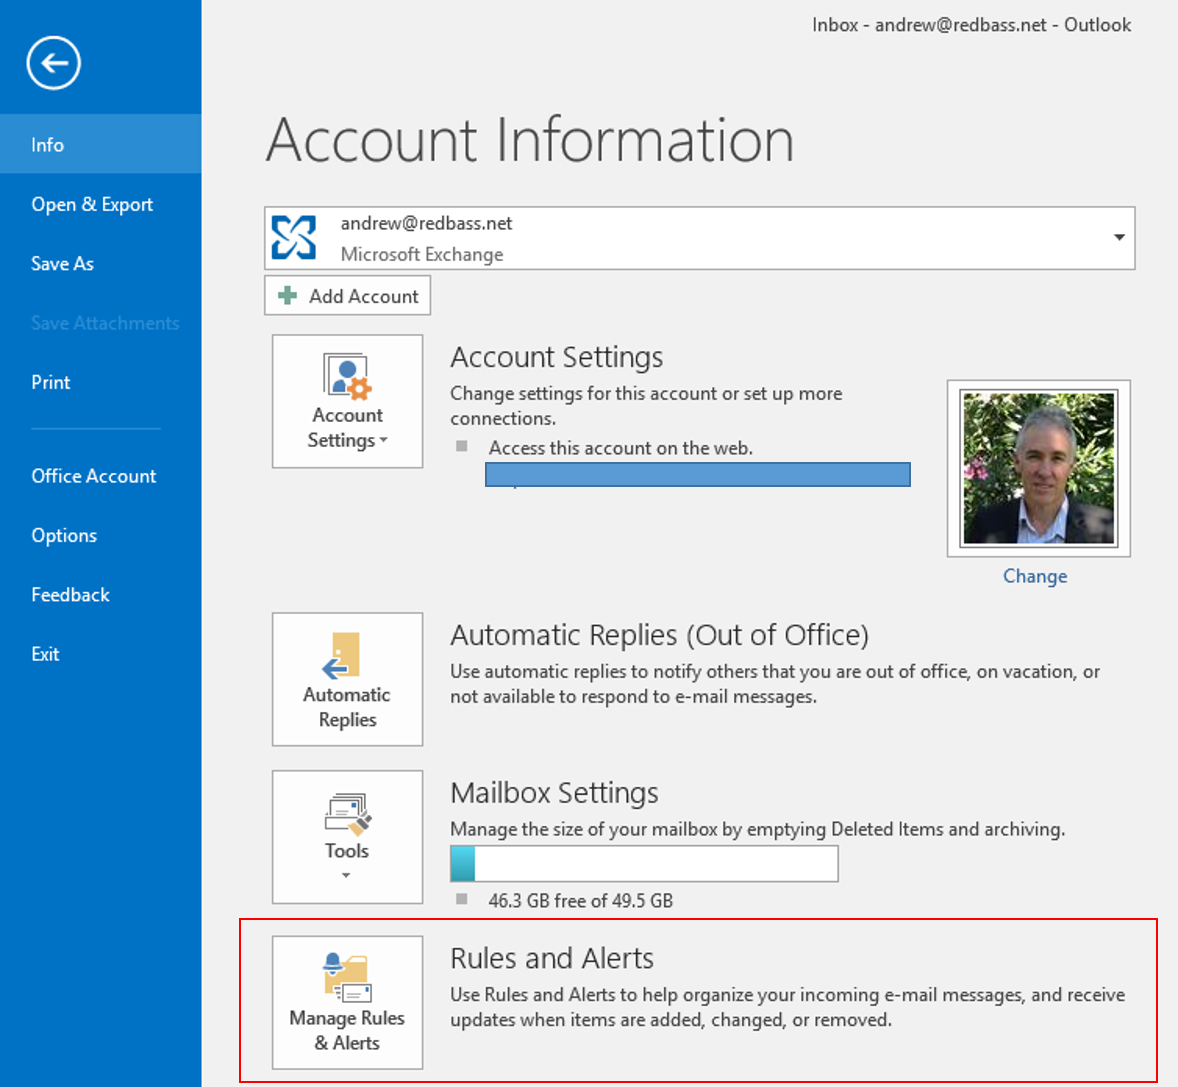
Click the ‘File’ menu and go to ‘Rules and Alerts’ as shown on the right:
In the ‘Rules’ wizard, chose the option to ‘Move Messages sent to public group to a folder’:
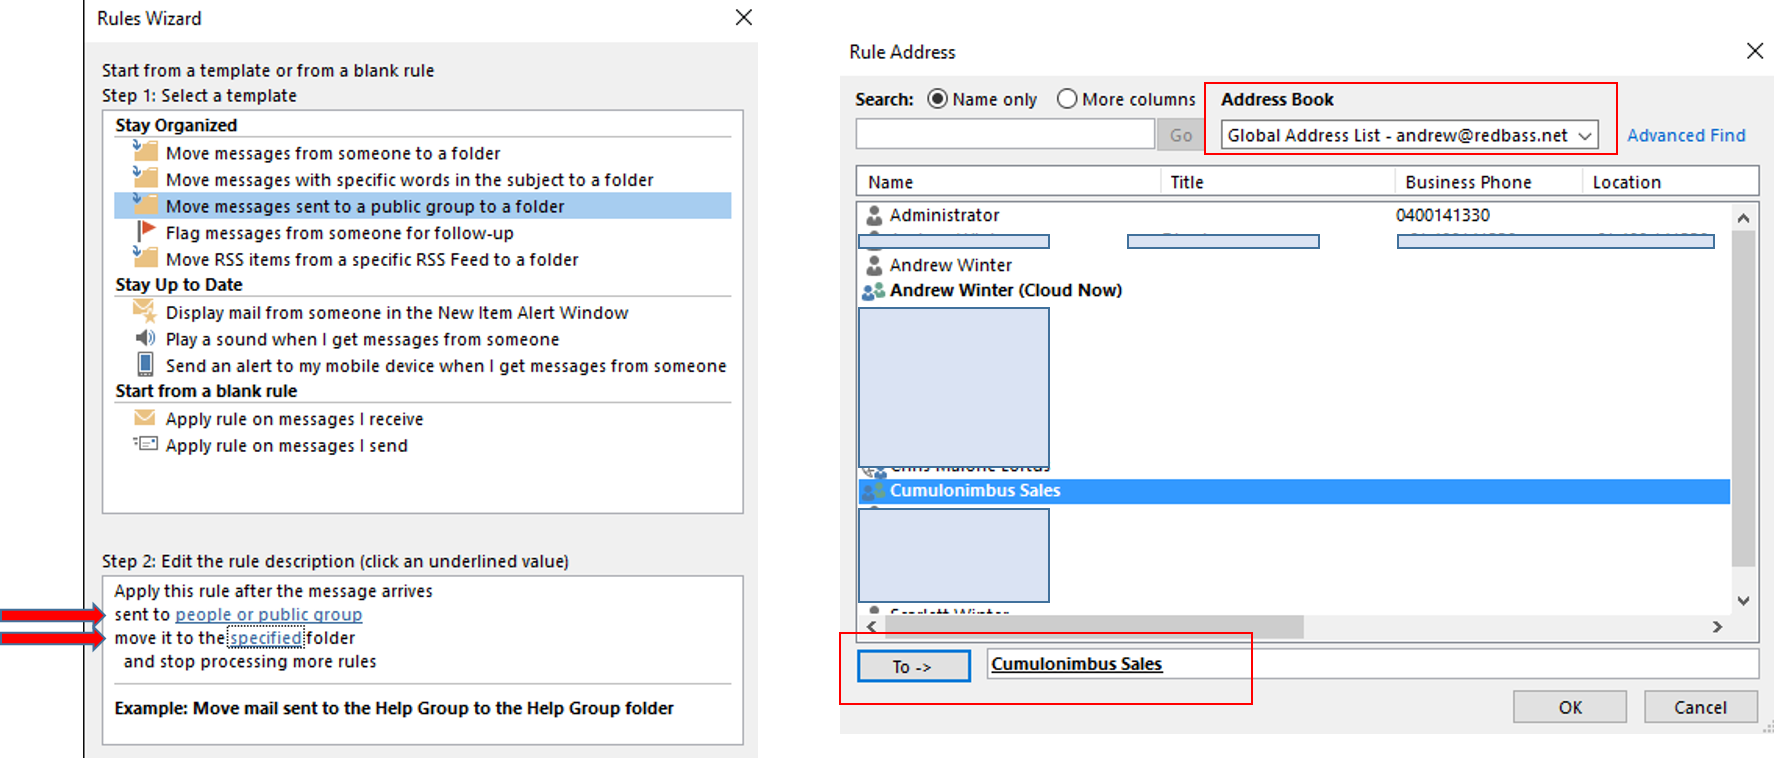
 Now you select the ‘Group’ and the ‘Folder’ using the options highlighted above. When you select the Distribution Group, you need to ensure you use the online Global Address List as the new Distribution Group might not yet be replicated into the offline cache:
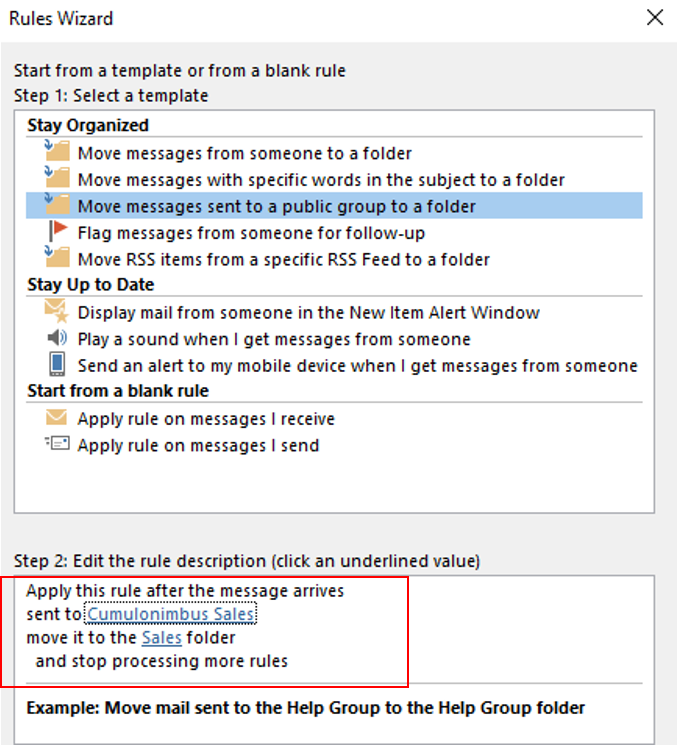
Once set up your rule looks like this (on the right) – you can now click ‘Finish’:
… now we are ready for the final step – checking we can ‘Send As’:
Compose a new message in Outlook, and in the ‘Options’ tab, select to include the ‘From’ field as shown below:
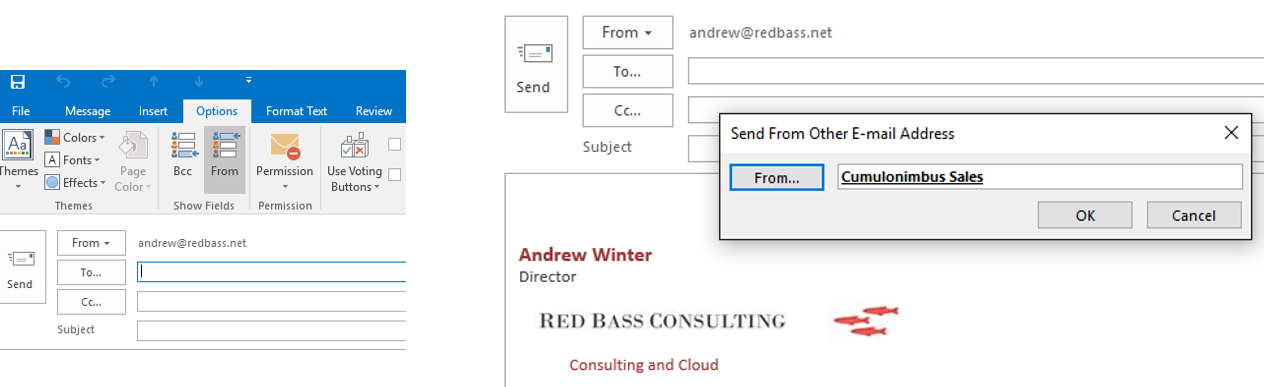
In the drop-down list next to ‘From’, select ‘Send from Other E-mail Address. Select the ‘From’ button, and once again make sure you select the online ‘Global Address List’ as you select your new Distribution Group.
Once you have done this, the option will appear automatically in the future.
We are now done! Test the process by sending email on the round trip and see new mail appear automatically in the new ‘Sales’ folder. Repeat this process for all addresses you want to manage in this way.